In the world of smart home gadgets, the Roomba is a trusty sidekick, tirelessly cleaning floors while you go about your life. But even our robotic heroes can face challenges, and one of the familiar foes is the stripped screw on the side brush.
If you’ve ever struggled with this issue or want to be prepared, you’re in the right place. This guide will help you troubleshoot and conquer the problem of a stripped screw on your Roomba’s side brush, ensuring your cleaning ally continues to serve you well.
Along the way, we’ll also explore the annoyance of a Roomba side brush that won’t stay put—often the culprit behind stripped screws. So, let’s dive in and equip you with the knowledge to keep your home clean and your Roomba in top shape.
Unraveling the Side Brush’s Role
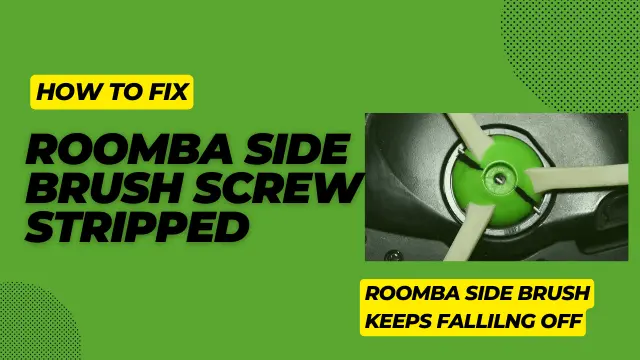
The side brush of your Roomba plays a pivotal role in its cleaning prowess. Before we dive into solving the issue of a stripped screw, it’s essential to grasp what the side brush does and how it fits into the Roomba’s cleaning mechanism. This understanding will provide valuable context for effective troubleshooting and maintenance.
The Role of the Side Brush
The side brush isn’t just a cosmetic addition; it’s a cleaning workhorse. Its primary function is to sweep away dirt and debris from edges and corners, areas where the main brushes might struggle to reach. Consider it your Roomba’s trusty sidekick, ensuring no crumb is left behind.
Components of the Side Brush
To appreciate the side brush fully, let’s break it down into its key components. It comprises bristles and a screw attachment. The bristles are strategically designed to agitate and dislodge dirt and dust from hard-to-reach areas, while the screw attachment secures the side brush firmly in place.
Attachment to the Roomba
You’ll usually find the side brush snugly attached to the underside of your Roomba, typically near its front edge. This secure attachment ensures the side brush doesn’t go rogue during cleaning operations.
Now that you’re acquainted with the side brush’s vital role and structure, you’re better prepared to troubleshoot and maintain it effectively. So, let’s continue our journey and address a stripped screw on your Roomba’s side brush.
Roomba Side Brush Keeps Falling Off
You’re not alone if you’ve experienced the frustration of your Roomba’s side brush frequently detaching during cleaning sessions. This common issue can be irritating, but fear not; we have practical solutions.
Causes of a Loose Side Brush
Understanding why your Roomba’s side brush keeps falling off is crucial for addressing the issue:
- Loose Screw: One common cause is a gradually loosened screw. As your Roomba moves and vibrates during cleaning, the screw holding the side brush can become less secure.
- Worn Components: Another potential cause is wear and tear on the side brush components, including the bristles and the brush itself.
If your Roomba’s side brush keeps falling off, it’s vital to examine not only the screw but also the area where it attaches.
Solutions to Prevent the Side Brush from Falling Off:
Let’s explore practical solutions to ensure your Roomba’s side brush stays firmly in place:
- Tighten the Screw: If the issue is a loose screw, you can quickly fix it using a screwdriver to tighten it securely. Be cautious not to over-tighten, as this can lead to a stripped screw.
- Inspect and Replace Components: Regularly check the side brush components, such as the bristles and the brush itself. If you notice significant wear and tear, consider replacing the side brush with a new one.
- Clean and Maintain: Keep your Roomba and its side brush clean. Dust and debris can accumulate over time, affecting the brush’s performance. Regularly clean the side brush and the area where it attaches to your Roomba.
The mounting area where the screw fits can wear out, causing the side brush to keep falling off. If you’re looking for a temporary DIY solution, consider using a small piece of rubber or silicone material, like a cut-up rubber glove or silicone pad. Place it over the worn area to enhance grip.
Signs of a Stripped Screw
Identifying a stripped screw is essential for effective troubleshooting. Here are the key signs to look out for:
Identifying these signs early can save you time and frustration when addressing a stripped screw on your Roomba’s side brush.
Step-by-Step Troubleshooting Guide for Stripped Screws and Screw Sizing
When confronted with a stripped screw on your Roomba’s side brush, follow these essential steps:
Step 1: Preparation and Identification
- Please turn off your Roomba and ensure it’s disconnected from power.
- Place your Roomba on a stable, flat surface.
- Examine the screws to identify the striped one.
Step 2: Removing and Replacing the Screw
If you have some plumber’s (thin white) tape, you can use it to wrap the stripped screw. This added thickness can help the screw regain traction in the receiving hole. This technique has proven effective in resolving similar issues.
- Replace the screw with the correct size and type for a secure fit. Regarding screw size, #6 x 40 and #6 x 32 seem too large with fine threads. A #4 x 32, about 1/4 inch long, is a better fit. The side brush can grip the motor shaft even without the screw.
Step 3: Reattaching the Side Brush
- Align and secure the side brush properly to your Roomba.
- Ensure a snug, but not overly tight, attachment.
By following these three steps, you’ll effectively troubleshoot and resolve the issue of a stripped screw on your Roomba’s side brush, ensuring your cleaning companion operates smoothly.
P.S.: Know how to get rid of clicking noise in your Roomba.
Certainly! Here’s a more organized and appealing presentation of the solutions to remove a wholly stripped screw:
Additional Troubleshooting Steps
| Method | Description |
|---|---|
| Rubber Band Method | Place a rubber band over the stripped screw, press down with your screwdriver, and turn counterclockwise. |
| Pliers | Use needle-nose pliers to firmly grip the stripped screw head and turn it counterclockwise. |
| Alternative Screwdriver Bits | Check your bit set for a snug-fitting bit that may engage with the stripped screw and help loosen it. |
| Heat | Gently heat the stripped screw with a soldering iron for a minute, then attempt to turn it counterclockwise. |
| Super Glue | Apply super glue to a wooden or plastic dowel, insert it into the stripped screw head, let it dry, and turn it. |
These methods provide you with a range of options to try and remove the stripped screw from your Roomba’s side brush. Be patient and use gentle force to avoid further damage.
Summing Up
In conclusion, addressing a Roomba Side Brush Screw Stripped is a manageable challenge with the proper knowledge. If you encounter this issue, remember to inspect both the screw and the mounting area. For added grip, you can try temporary solutions like a plumber’s tape or a small rubber or silicone material. However, keep in mind that these are quick fixes.
Consider professional assistance or replacement parts for a more permanent solution or if the problem persists. With these insights and a proactive approach to maintenance, you can keep your Roomba operating smoothly, ensuring a hassle-free cleaning experience in your home.
FAQ.
What is Roomba Side Brush Screw Size?
A #4 x 32, about 1/4 inch long, is a better fit and works fine with series 500, 600, and 700.
Can I Use My Roomba Without the Side Brush?
Yes, you can use your Roomba without the side brush, but it may affect its cleaning performance, especially along edges and corners.

Hi Everyone.
I’m Safeer. I always loved trying out the latest cleaning and home products and sharing my thoughts about those products with you awesome people. Whether it’s related to general cleaning or it includes cleaning with high-tech vacuum cleaners, I always test them myself and then share valuable opinions with you. Additionally, I also let you know how to resolve particular issues of vacuum cleaners. To look for detailed reviews and troubleshooting tips about vacuum cleaners VaccumCleanersMag is the perfect abode for you.